
How to Install ETCMC Node on Windows
Welcome to our detailed guide on installing the ETCMC Web GUI Client on a Windows Operating System. This step-by-step tutorial will guide you through the process of downloading, installing, and configuring the ETCMC Client, ensuring your node is operational and efficient. Setting up an ETCMC Node allows you to actively participate in the Ethereum Classic network, enhance its security, and potentially earn ETCPOW rewards. Follow the instructions below to successfully install and configure your ETCMC Node on Windows.
STEP 1: Download ETCMC Software
Visit the official GitHub page to download the ETCMC Installer with the latest client release: Download Link
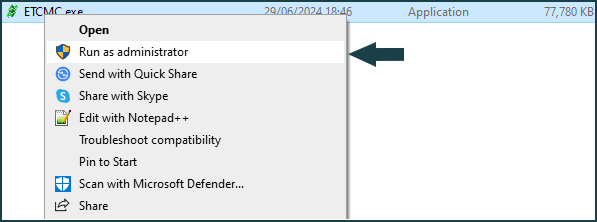
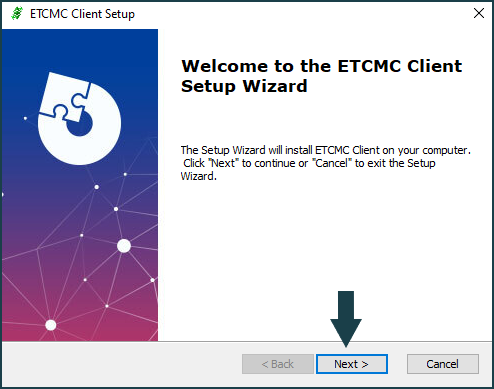
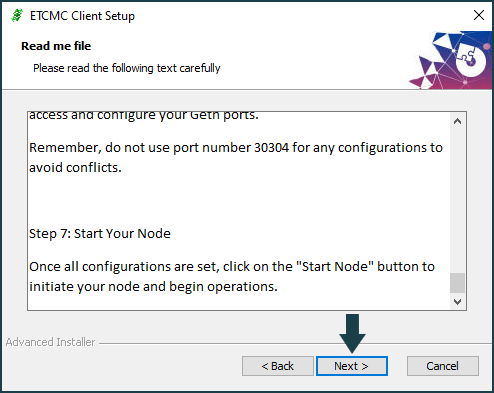
STEP 2: Run the ETCMC Client Setup Wizard
-
Right-click on ETCMC.exe and select Run as administrator to ensure proper installation.
-
Click More Info on the Microsoft Defender SmartScreen page and then click Run anyway.

-
Click Next to proceed with the ETCMC Client Setup Wizard installation.
-
Click Next after reading the installation instructions.
-
Tick the checkbox for License Terms and Conditions and click Next.

-
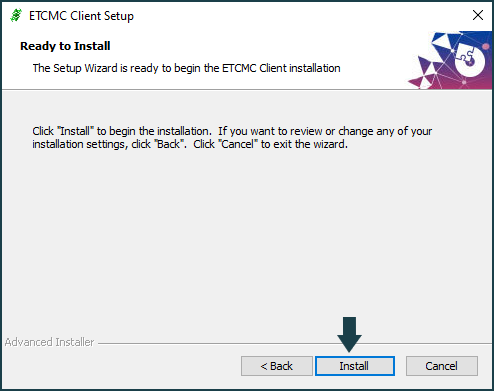
Click Install to begin the installation process.
STEP 3: Launch and Configure ETCMC Client
-
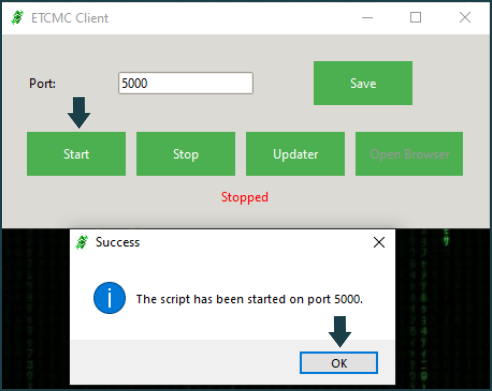
Launch the ETCMC Client and navigate to the port settings to assign a unique port to each node, starting from port
5000. Click the Save button to apply your new port settings.
-
Click Start to be automatically directed to the ETCMC Web GUI login page.
-
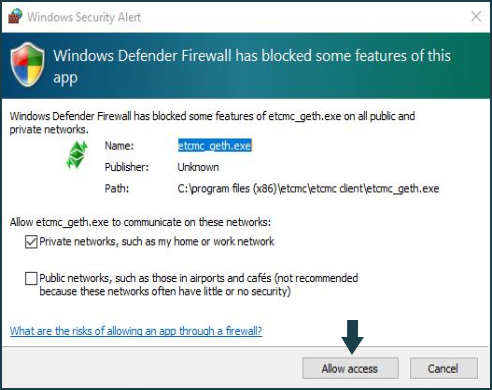
Click Allow access when prompted by the Windows Defender Firewall alert.
-
Log in using the default credentials: Account:
admin/ Password:password.
STEP 4: Register the Node on ETCMC Web GUI
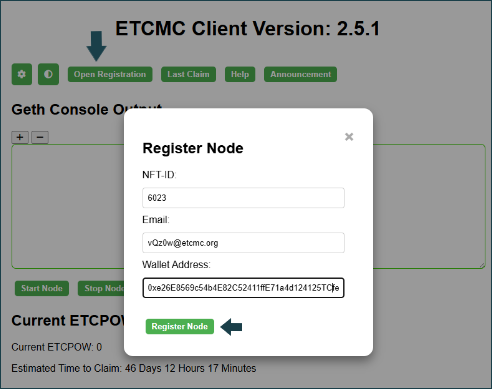
- Click Open Registration to register your ETCMC node.
- Enter the License NFT Token ID for each node.
- Use the Email address associated with your license purchase for registration if you purchased your license directly. If you purchased your license NFT from the marketplace, you may use any valid email address.
-
Enter the valid ETC wallet address that holds these ETCMC License NFTs.
STEP 5: Configure Geth Ports
-
Click the Settings icon in the top left to configure the Geth ports and avoid using port
30304to prevent conflicts.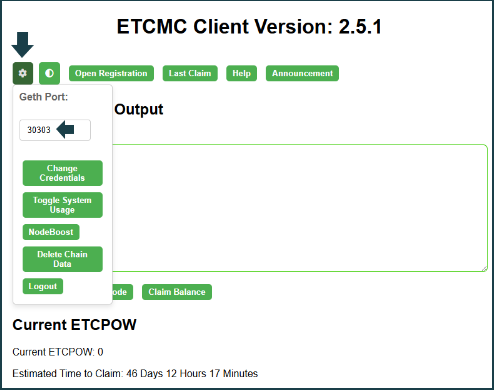
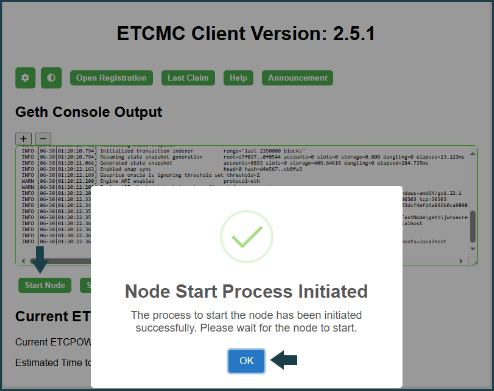
STEP 6: Start ETCMC Node
-
Once all configurations are set, click the Start Node button to initiate the Node process and start earning ETCPOW.
Video Tutorial
For a visual guide on setting up the ETCMC Web GUI Client, check out this YouTube tutorial: ETCMC // How to Install an ETCMC Node Launcher
Congratulations!
You have successfully installed and configured your ETCMC Node on Windows. For further assistance, refer to the user manual or contact our ETCMC support team.
ETCMC_vQz0w