.png)
How to install ETCMCv2 Node on Headless Debian
How to install ETCMCv2 Node on Headless Debian
Step-by-step guide to install a headless Debian 13 system, enable SSH access, install the ETCMCv2 client, and register/start your node.
Before you start: You need a valid License NFT first.
Tutorial: How to get a License NFT
Tutorial: How to get a License NFT
Optional remote setup: In this tutorial, root SSH is enabled so you can connect later via PuTTY.
This is optional — you can also continue working locally on the Debian machine (keyboard + monitor directly attached).
Table of Contents
1) Prepare USB installer (Debian ISO + Rufus) 2) Install Debian 13 (Headless base system) 3) Enable root SSH (optional for PuTTY access) 4) Install ETCMCv2 client on Debian (Linux installer script) 5) Open Web UI and register the node 6) Final notes1) Prepare USB installer (Debian ISO + Rufus)
Debian ISO used
debian-13.3.0-amd64-netinst.isoType
amd64 netinstUse case
Headless Debian base systemWrite the ISO to a USB stick with Rufus (Windows) or a similar USB imaging tool. Then boot the target machine from that USB stick.
Tip: If you use a remote server / mini-PC without a monitor later, finish the Debian installation first,
then continue either locally or via SSH (PuTTY) after enabling SSH.
2) Install Debian 13 (Headless base system)
The following steps cover the Debian installer flow. Some screens where you only click Continue are summarized, while important choices are shown with screenshots.
- Boot from the Debian USB stick and select Graphical install.

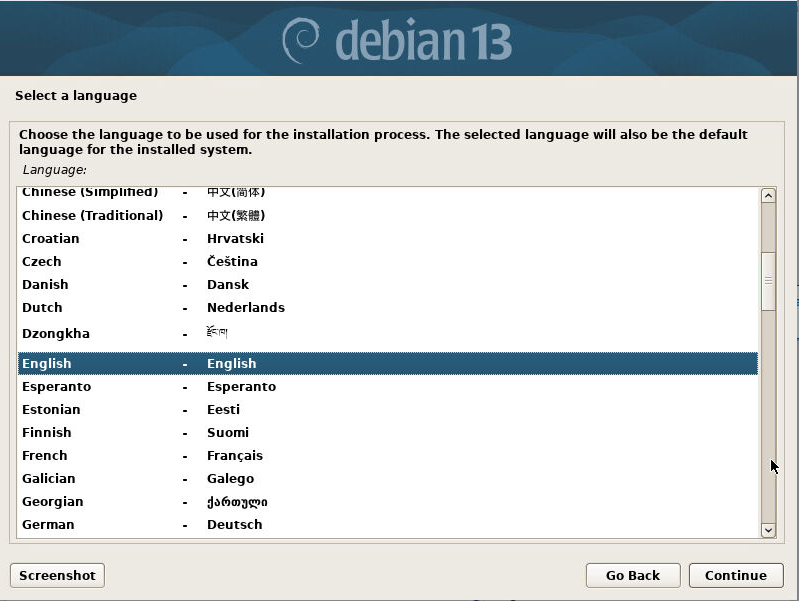
- Select your installation language (example: English).
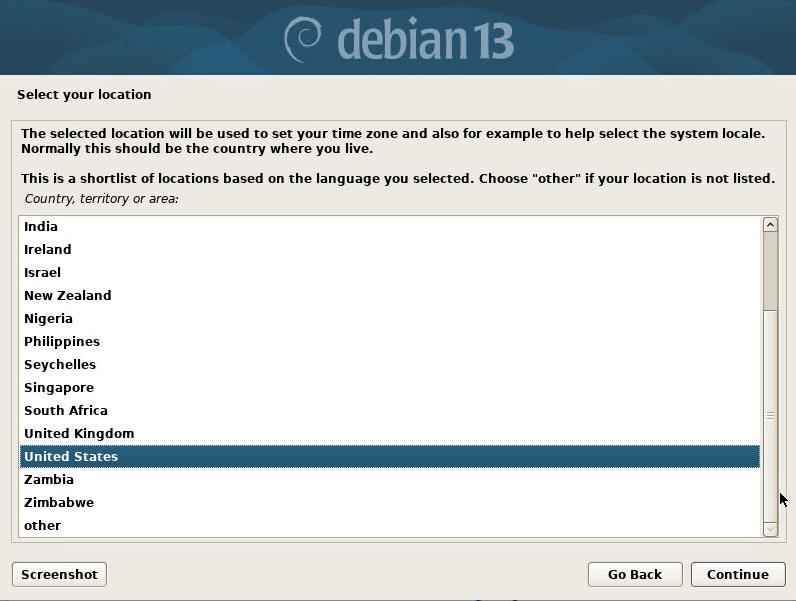
- Select your location / country (used for timezone + locale defaults).
- Select your keyboard layout.
- Configure hostname / domain (or leave defaults if appropriate).
- Create/set a root password.
- Create a normal user (if prompted by the installer).
- Continue through the mirror / package setup steps.
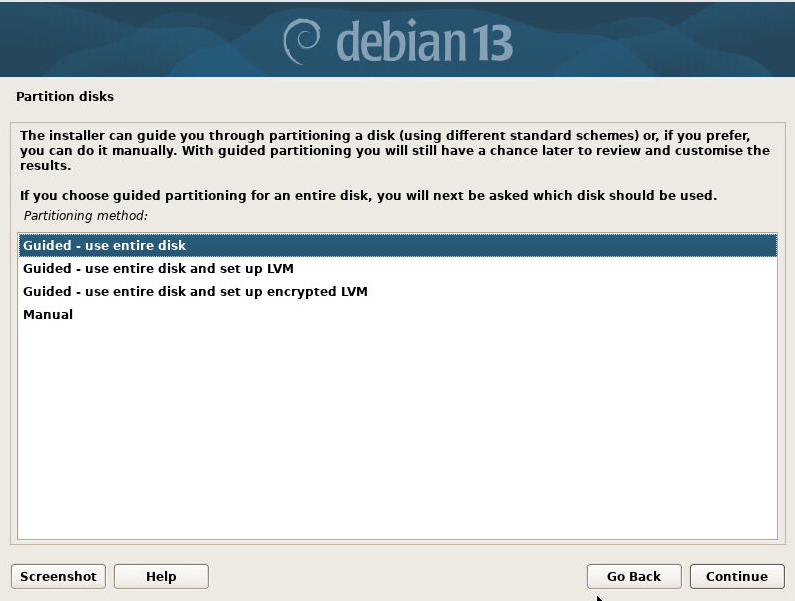
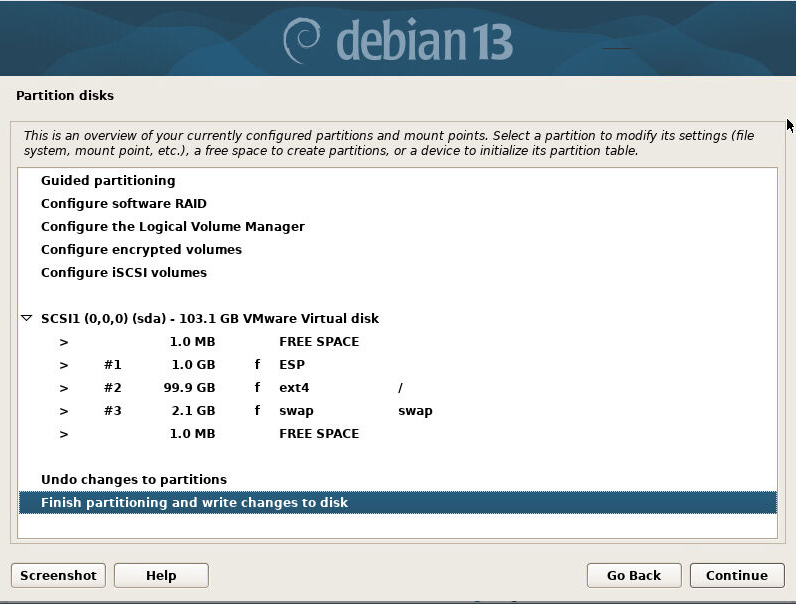
- At Partition disks, choose Guided - use entire disk.
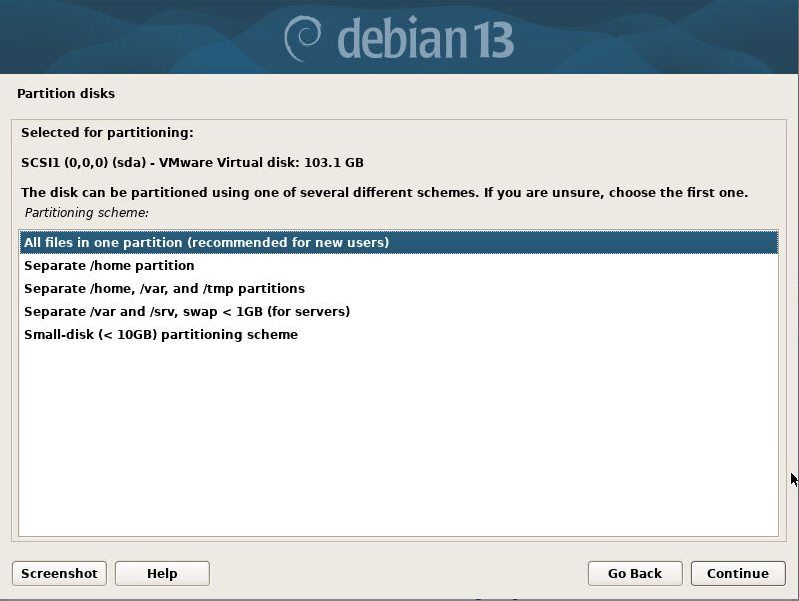
- Select the partitioning scheme All files in one partition (recommended for new users).
- Select Finish partitioning and write changes to disk, then confirm the changes.
- Wait while the base system installs.
- Continue through package manager / mirror prompts.
- When you reach Software selection, keep it headless: select SSH server and standard system utilities.
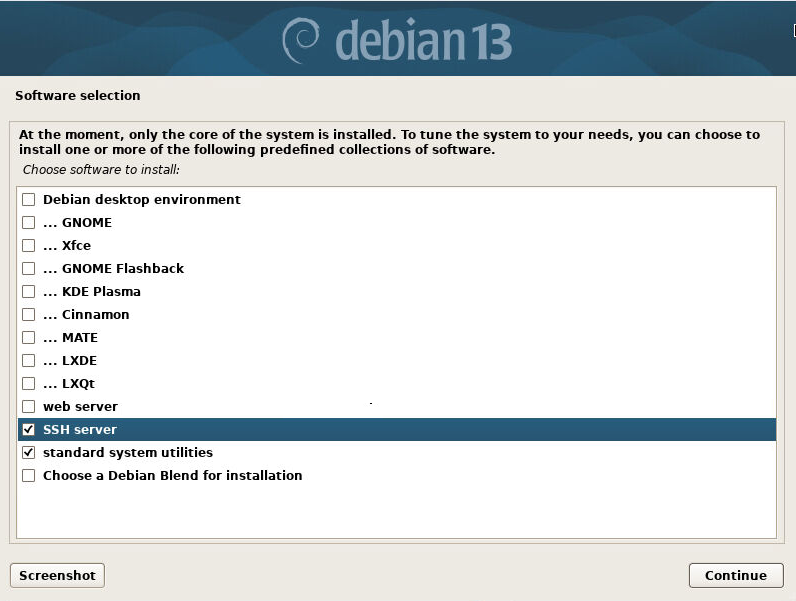
- Do not select a desktop environment for this headless setup.
- Install GRUB bootloader when asked, then finish the installation.
- Remove the USB stick and reboot into Debian.
Headless reminder: The goal is a minimal Debian install with SSH access (no desktop UI required).
3) Enable root SSH (optional for PuTTY access)
This tutorial enables root SSH login to make remote administration easier (for example with PuTTY on Windows). If you prefer, you can skip remote access and continue working directly on the Debian machine locally.
- Log in as root and open the SSH configuration in Nano:
nano /etc/ssh/sshd_config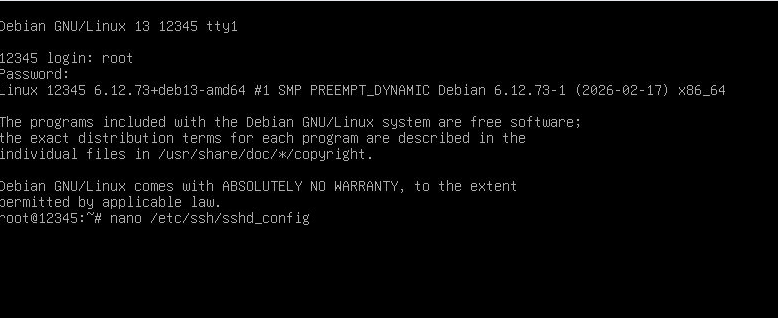
/etc/ssh/sshd_config with Nano.- Find the line
PermitRootLoginand set it to:
PermitRootLogin yes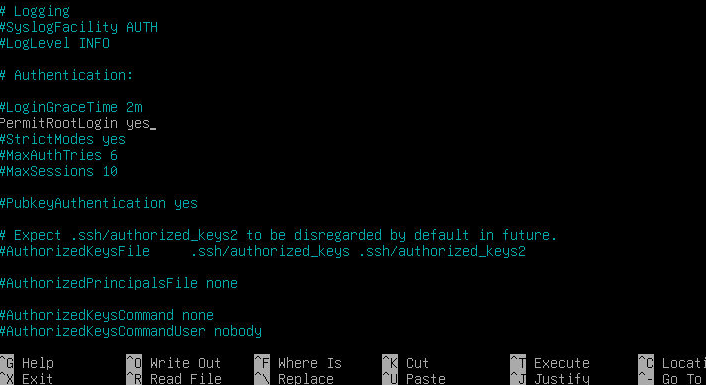
- Save the file in Nano (Ctrl+O, Enter), then exit (Ctrl+X).
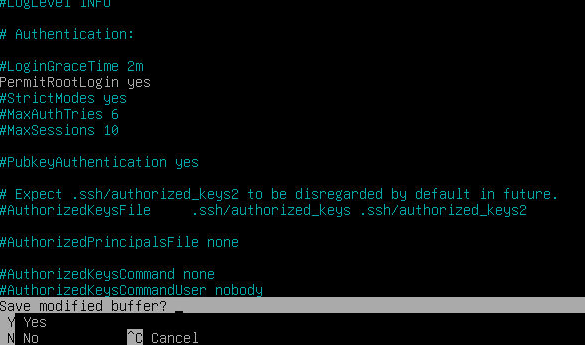
systemctl restart ssh
Security note: Root SSH is convenient for setup, but for long-term production use, consider a normal user + sudo and key-based SSH authentication.
4) Install ETCMCv2 client on Debian (Linux installer script)
You can continue either:
- Locally on the Debian machine, or
- Remotely from another PC via PuTTY (SSH) after enabling SSH.
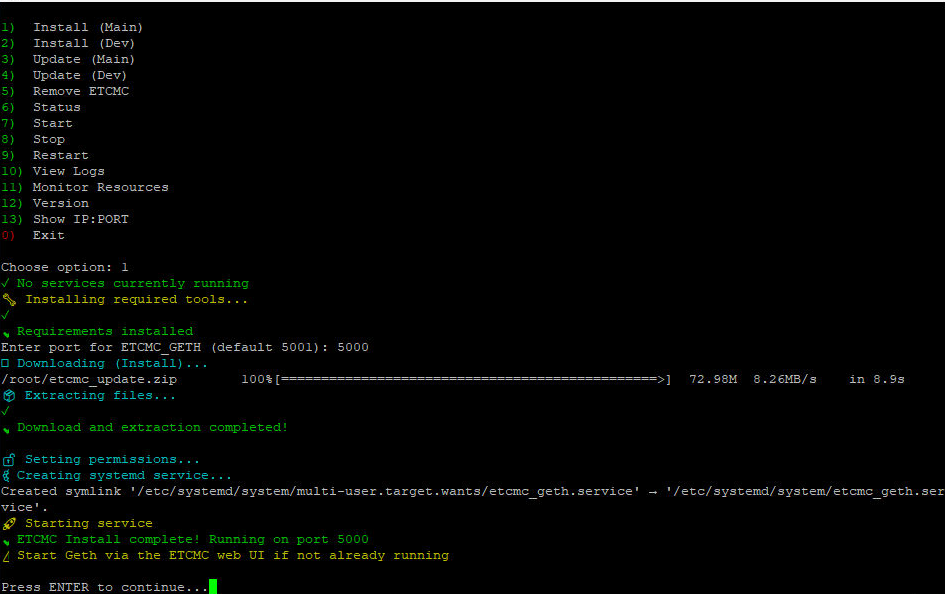
- Run the ETCMC Linux installer script in your shell (as root in this tutorial):
bash <(wget -qO- https://github.com/Nowalski/ETCMC_Software/releases/download/Setup%2FWindows/etcmc_installer.sh)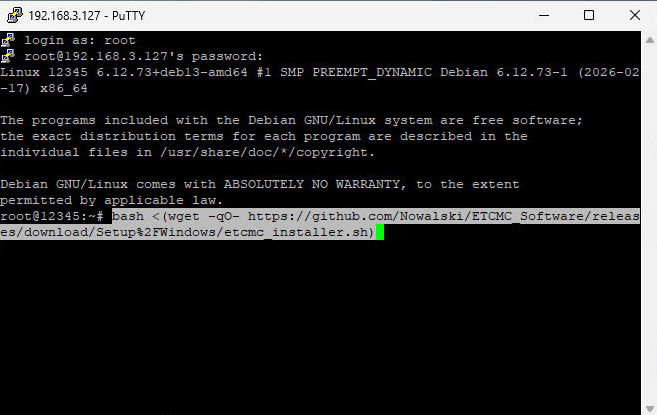
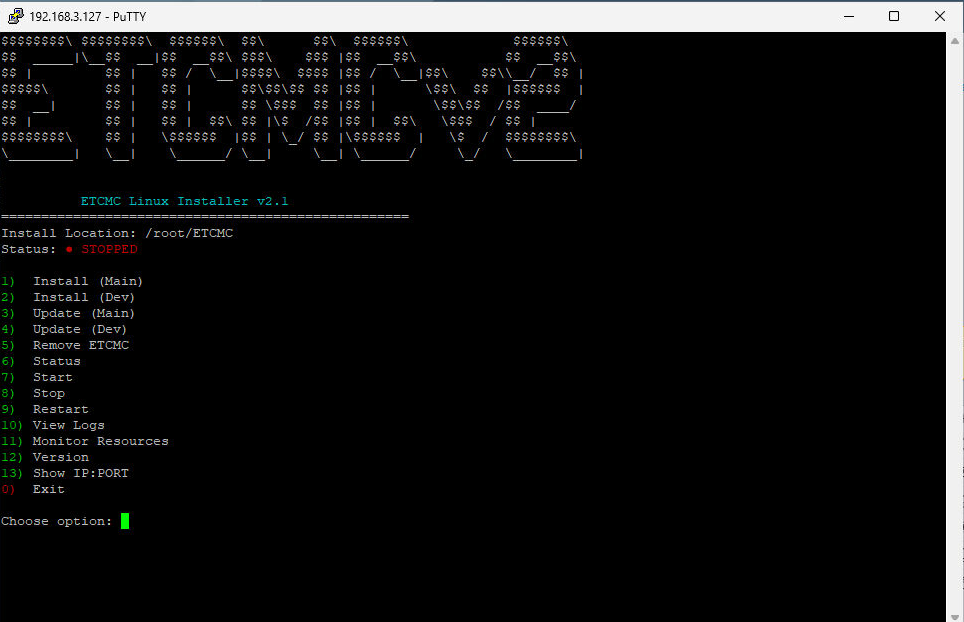
- In the installer menu, choose 1) Install (Main).
- Enter the port for
ETCMC_GETH(default is 5001; example here uses 5000).
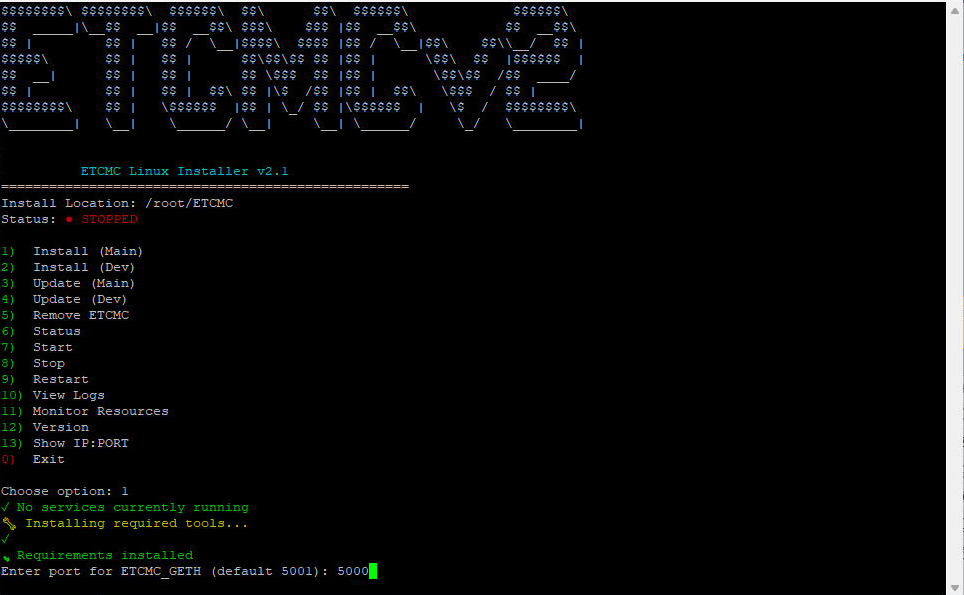
- Wait until installation is complete and the service is created/started.
Done: Debian + ETCMCv2 client are installed. Next, open the ETCMC web UI and register your node with your license NFT.
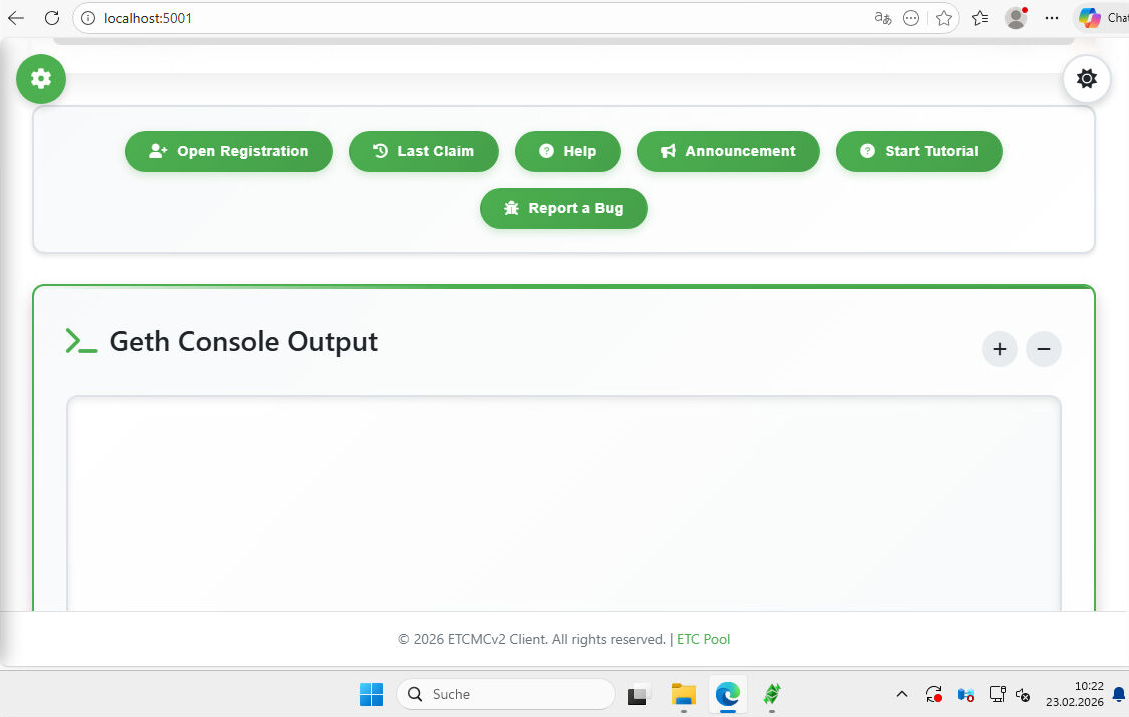
5) Open Web UI and register the node
On a remote PC, open the browser and enter:
http://DEBIAN-IP:5000 (replace 5000 with your chosen port, and DEBIAN-IP with your Debian machine IP)- Open the ETCMCv2 web UI and sign in with the default credentials:
Username: admin
Password: password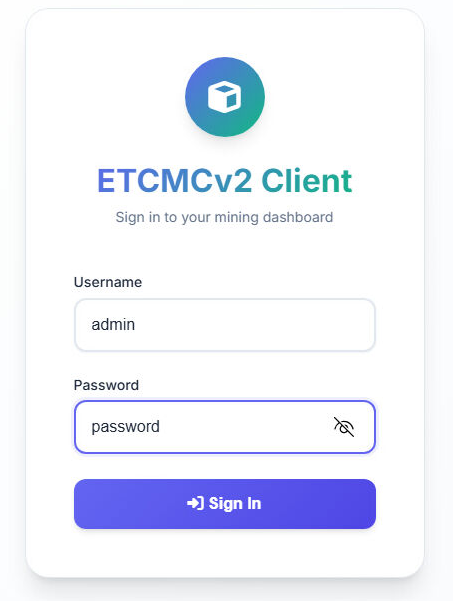
- Scroll down and click Open Registration.
-
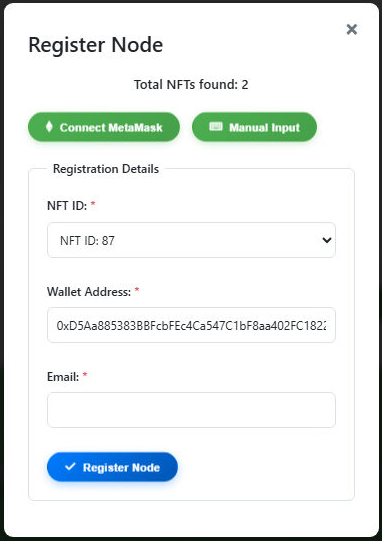
The Register Node window opens. There are two options:
- Connect MetaMask (automatic)
- Manual Input (manual wallet entry)
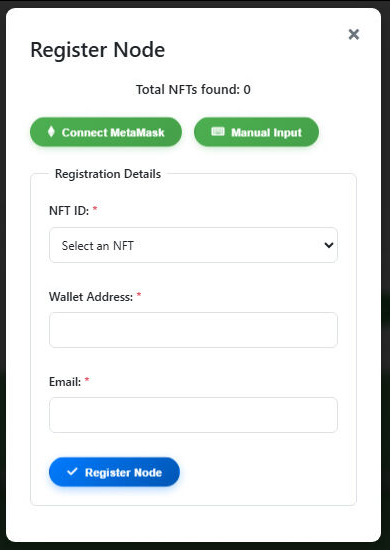
- Enter your wallet address and submit it.

- The registration form now shows available License NFTs. Select an unused License NFT, enter your email address, then click Register Node.
- After registration, click Start Node.
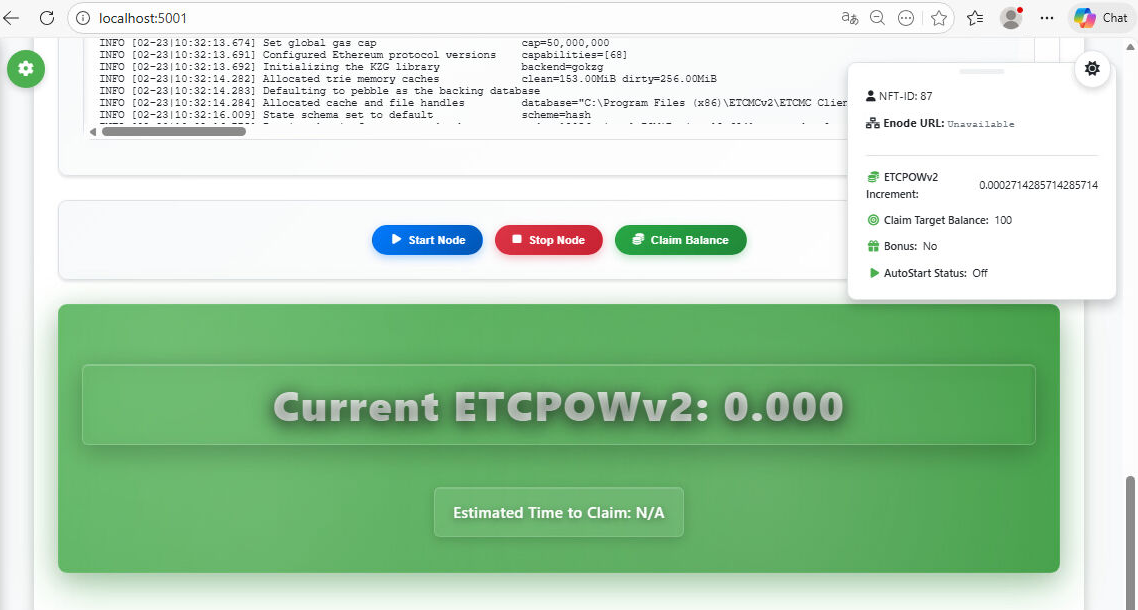
Node running: Your ETCMCv2 node is installed and registered. You can now monitor it from the ETCMC web UI.
6) Final notes
- From step 25 onward, the process is essentially the same as in the Windows tutorial (web UI registration flow).
- If you changed the default port during installation, use that port in the browser URL instead of
5000. - Make sure your selected License NFT is not already in use by another node.
- If you prefer, you can later switch from manual registration to MetaMask-based workflows where supported.
Need a license first? See: How to get a License NFT